Tuesday, August 30, 2011

Chocolate Mint Cookie Dough Ice Cream Pie

It all started with the chocolate graham crackers. Sawyer turned to me at breakfast and asked, "Mommy, can we make cookies with the shapes?" A while back I bought a pack of 100 cookie cutters that helped for a while in getting Sawyer to eat when he was having a rough time getting motivated. You don't want french toast, eh? What about 'truck bites'?! Everything looks more appetizing to a two-year old boy when it is shaped like a car. But despite his eating difficulties from ages 1-2, one thing I have never had trouble getting Sawyer to eat is dough--cookie, bread, muffin, pancake--he would eat them all raw even when the cooked product was circumspect. So when I introduced Sawyer to the joy of combining eating cookie dough with making car shapes, he was hooked. On this particular day, I decided that we would try to make our own chocolate graham crackers, since they are hard to find at the store without high-fructose corn syrup and partially-hydrogenated soybean oil. I based the recipe on the one in the King Arthur Flour Whole Grain Baking Book, which makes for crackers that are not vegan and are too full of butter and sugar. We didn't roll our crackers thin enough, though, so they were more like cookies. But, oh, were they chocolatey!

Chocolate Graham Crackers

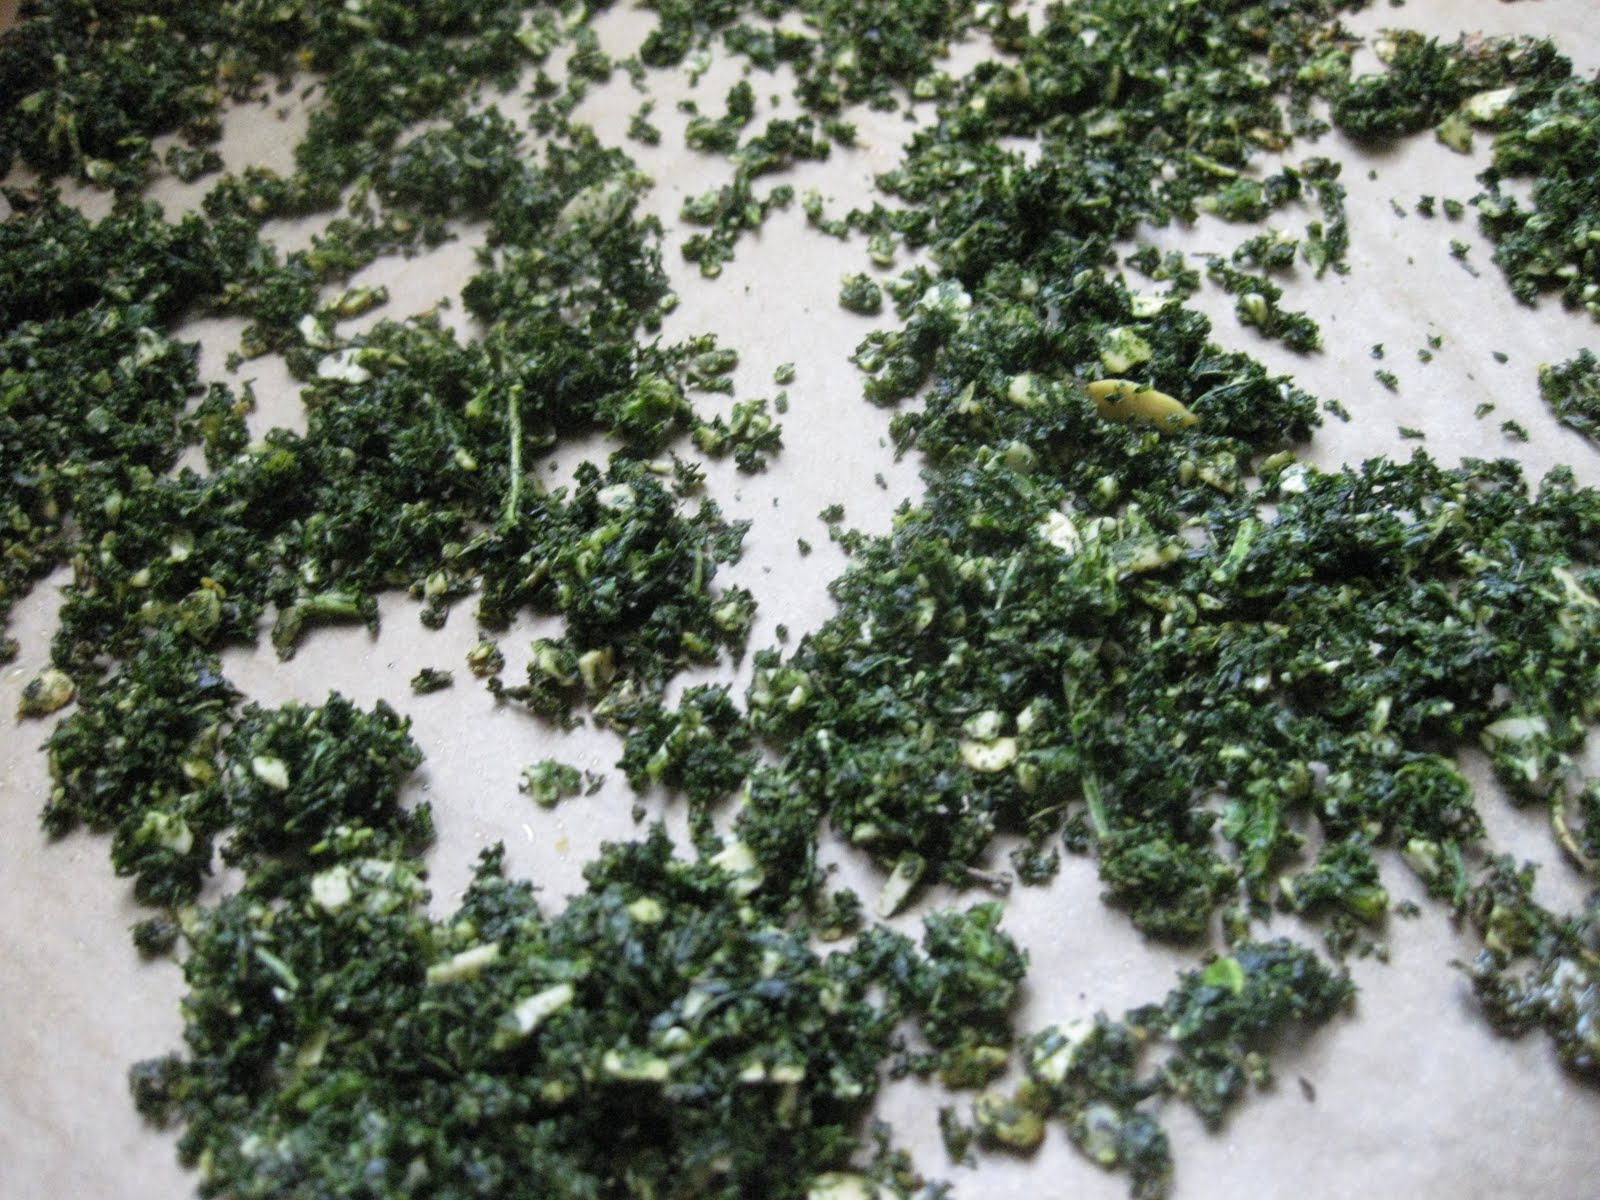
1. c. barley flour (could sub white or more whole wheat)
1 c. whole wheat pastry or white whole wheat flour
1 c. cocoa powder
1/2 c. coconut sugar or brown sugar
1 tsp. baking powder
1/2 tsp. salt
1/3 c. canola or melted coconut oil
1/3-1/2 c. non-dairy milk
1/4 c. agave or maple syrup

Preheat the oven to 350 and line a baking sheet with parchment paper. Combine flours, cocoa powder, sugar, baking powder and salt in a medium mixing bowl. Add the oil, 1/3 c. non-dairy milk, and syrup. Stir the wet ingredients into the dry with a fork until thoroughly moistened and the dough can hold together in a ball like pie crust. Add additional milk if necessary to moisten. Knead the ball of dough a few times on a floured work surface, and then roll out; we did about 1/4 inch thickness, which made them more like cookies. You will need to be less lazy than I was and roll the dough our to about 1/8 inch thickness to get true crackers. If you are going to make the ice cream (see recipe that follows), then you will need to reserve 1/3 of the dough. Cut the dough into your desired shapes, place on the prepared baking sheet, and bake in the preheated oven for about 10 mins for softer cookies, 12 mins for crisper ones.


The cookie/crackers were tasty, but we made far too many, and I even had extra dough left-over, so I needed to find a way to use the excess. Thus the ice cream was born. As a teenager I worked at Baskin Robbins, and, as if there weren't enough flavors there already, I would dream up new flavors I wished they had. One was mint chocolate cookie dough. This old fantasy came back to me when the leftover chocolate cookie dough in the freezer teamed up with Sawyer's penchant for green, and the new bottle of spirulina powder in the cupboard. How often had he asked me for green ice cream, and I hadn't had a way to satisfy his whim? Now, I had a natural source of green dye and the means to make the vegan mint chocolate cookie dough I had longer for all these years! The idea of using spirulina powder to make green mint ice cream is one I read in jae steele's Ripe from Around Here, but I do not like how the mint ice cream recipes in her book use water and coconut oil. That combination made for rock-hard ice cream that was too icy rather than creamy. Here is my version of non-dairy mint:

Mint Chocolate Cookie Dough Ice Cream

1 can full-fat coconut milk
1 c. plain non-dairy milk or additional coconut milk, if you want it super creamy
1/2 c. agave nectar
1-2 tsp. mint extract, to taste
1 tsp. spirulina powder (This made it pretty green; if you want a pale green color, use 1/2 tsp at the most)
Remaining cookie dough from the recipe above, about 1 cup

Blend the first 5 ingredients in a blender until fully combined, and then freeze in an ice cream maker according to manufacturer's directions. Once the ice cream is getting firm, about five minutes before you would normally transfer it to the freezer, break the cookie dough into bite-sized pieces and slowly add them to the ice cream maker. Once they're all mixed up, place the ice cream in the freezer for a few hours to firm up. Here is what ours looked like right after I made it:


Here is what Abiline looked like eating it. I know, I'm terrible; starting her on chocolate so young. But I don't believe in the hypocrisy of denying my kids treats while I freely enjoy them. Most of what we eat is so wholesome anyways...Enough of my rationalizations.

There's no picture of Sawyer with a cone because, after all of his begging for green ice cream, I couldn't get him to touch it until it was in pie form. So on to the pie. I found myself with a lot of chocolate cookies and mint cookie dough ice cream, and I needed a dessert for a little dinner party we were having. With an extra layer of chocolate on top (topping inspired by a recipe in 500 Vegan Recipes), the combo was sooooo good. Sawyer actually had a moment of stunned silence when he tasted it; I think because he was expecting the worst but got the best.


Chocolate Mint Cookie Dough Ice Cream Pie

For crust:
2 cups crushed chocolate graham cracker cookies
2 Tbsp. canola or coconut oil
2 Tbsp. agave or maple syrup

1 recipe chocolate mint cookie dough ice cream

For Topping:
1/2 c. chocolate chips
1 tbsp. Earth Balance margarine
1 c. vanilla non-dairy yogurt (I used home-made coconut milk yogurt)
1/4-1/2 tsp. mint extract, to taste

1. Preheat the oven to 350. Grease a 9 " pie pan. Combine crushed graham crackers, oil and syrup until the crumbs are thoroughly moistened, and then press them evenly into the pie pan. Bake in the preheated oven for 10 mins, and allow to cool completely.
2. While the crust is cooling, melt the chocolate chips and Earth Balance in the microwave for 1 minute, and then stir with a fork until smooth. Buzz in a food processor with the yogurt and mint extract.
3. Once the crust is cool, take the ice cream out of the freezer and let it soften for a few minutes so that you can spread it over the crust. Scoop it into the crust, and smooth it out until it is an even layer. Spoon the chocolate topping onto the ice cream and smooth it out. Freeze the pie for at least 2 hours before serving to firm it up.

Monday, August 22, 2011

Toddler Tabouli (Sort Of)


Here is my son Sawyer doing the "I don't want to eat bulgur" dance. He changed his mind after tasting this "Ummmm...there's nothing for lunch!" creation. Abiline devoured it (see below). Technically this isn't tabouli because of all the extra stuff I added, but it does have the olive oil, lemon juice, and parsley that tabouli requires. I added halved grape tomatoes to my portion, but the kids are not into raw tomatoes, so I don't force it on them. I don't think I "discovered" the joy of the raw tomato until I was in college, so there is hope for them yet.


1 c. uncooked bulgur
3 c. water
1/4 tsp salt, plus more to taste after it's all mixed up
1 1/2 Tbsp. tahini
1 Tbsp. olive oil
2 Tbsp. lemon juice
1 tsp. dried parsley
1 carrot, scrubbed and finely grated
1/2 c. garbanzo beans
1/2 c. broccoli florets
1/2 c. halved cherry tomatoes, optional

1. Boil water with 1/4 tsp. salt, and add the bulgur. Cook for 10-15 minutes, until all the water is absorbed. Let cool.
2. Microwave the carrot and broccoli for 2-3 minutes, until very tender. Puree the veggies with the garbanzo beans in a food processor.
3. Add the tahini, olive oil, lemon juice, parsley, and pureed beans and veggies to the cooked bulgur and stir to combine. Taste and add additional salt if necessary. Garnish with cherry tomatoes, if desired, and enjoy!


A Bean and Seed Veggie-Burger Recipe


On Friday I had planned on making a recipe for Thai burgers from the new Peas and Thank You cookbook, but then I realized that I didn't have most of the ingredients. So I made up my own basic veggie burger, which had such great texture that I decided to post it even though veggie burgers are not usually particularly noteworthy. We like to butter the bread and fry our veggieburger sandwiches in the Holden household to get some extra calories into the kids. If you are not wary of excess calories, then I highly recommend this method. I served these particular grilled sandwiches with the nutritional yeast cheesy sauce from Go Dairy Free, and everyone gave them the thumbs up, but use whatever toppings you like on your burgers if the grilled cheese patty isn't for you.

1 c. oatmeal, finely ground in a food processor
1 1/2 c. adzuki or black beans (can sub 1 can if not using homemade)
1 1/2 c. chickpeas (can sub 1 can if not using homemade)
3 Tbsp. pumpkin seed butter (could sub 1/4 c. ground pumpkin seeds and 1 Tbsp. oil)
1/2 c. pineapple chunks (Yes, I put pineapple in everything nowadays. I bought a huge can of it at Costco :o)
2 Tbsp. liquid coconut aminos, or soy sauce if you don't have any soy allergies
1/4 c. chia seeds (could sub ground flax seeds)
2 tsp. chile powder
1 tsp. crumbled, dried rosemary
1/4 tsp. salt
2 small or 1 large carrot, finely grated

In a food processor, puree the beans with the pumpkin seed butter, pineapple, coconut aminos, chia seeds, chile powder, rosemary, and salt. Transfer to a mixing bowl, and add ground oats and grated carrots, and stir to combine. Refrigerate for 30 mins. if you can to firm it up. When you are ready to fry them up, heat a tablespoon or two of olive or grapeseed oil in a frying pan and cook them until nicely browned on both sides.


Carrot Cake Pancakes


Pancakes are probably my favorite breakfast because they are so filling and because the basic pancake recipe is so flexible. Growing up, my mom would make Hungry Jack pancakes from the blue box--the one to which you had to add eggs, milk, and oil--as a special treat for dinner. Well, we thought it was a special treat, but really she probably liked making breakfast for dinner because it was quick and easy--a nice break for her! We loved "gushers," which were pancakes that were just barely cooked on each side, so that the middle was all gooey with uncooked batter. My husband thinks this is totally unappetizing, but for me the raw middle makes for an extra-creamy, melt in your mouth texture that is just as much superior to a well-done pancake as cookie dough is to the baked cookie. If you're not with me on the cookie dough, then I guess you wouldn't go for the gusher. But, whatever your pancake preferences, these carrot cake pancakes are worth the extra time in the morning. Abiline, my 14 month old, really liked that they turned out soft so that she could gum them easily. Still only 6 teeth in that little mouth.

1 1/2 c. white whole wheat flour, or whole wheat pastry flour
2 tsp. baking powder
1/2 tsp. baking soda
1 tsp. cinnamon
1/2 tsp. salt
3 medium carrots, finely grated
1/4 c. raisins, soaked in boiling water for 10 mins, then drained.
1/2 c. yogurt (I used homemade coconut milk yogurt)
3/4 c. diced pineapple with juice
1 tsp. vanilla
1/2 tsp. orange extract
1/2 tsp. coconut extract (optional)
1 1/4 c. non-dairy milk (I used So Delicious coconut)
2 Tbsp. melted coconut oil or canola oil

1. Preheat your griddle or frying pan over medium heat. Grease generously if not using non-stick. Combine the flour, baking powder, baking soda, cinnamon and salt in a medium mixing bowl.
2. In a food processor, combine the carrots, raisins, yogurt, pineapple, extracts, non-dairy milk, and oil and puree. Add the wet ingredients to the dry and stir just until well blended.
3. Pour batter by 1/4 cup fulls onto the preheated griddle and cook for 3-5 minutes, until bubbly around the edges. Flip the pancakes and cook for another few minutes on the other side--just 1-2 minutes for gushers, or until you press on the pancake with the pancake turner and nothing oozes, if you are of the full-cooked persuasion.


Thursday, August 18, 2011

Ultra-Creamy Sweet Potato Pasta Bake

Growing up, we didn't eat pasta very much, and I'm really not sure why. It could be that my mom hates garlic (or at least garlic breath), and my dad is against onions, which tend to be prominent flavors in the pasta world. Mom would make spaghetti every once in a while by adding a scant amount of a package of Lawry's spaghetti seasoning (dated from 1974) to a pot full of tomato sauce and then ladeling it over noodles cooked into plump worms. You have to understand, my mother just loves soggy food. An al dente noodle would have been a violation of the Wonder bread truism that carbs can be wadded up into a squishy ball. I sure loved that spaghetti, but I showed signs at a young age that my tastes were leaning in another direction, as I always requested to crunch on some raw noodles while Mom was boiling the rest.

As an older child I swooned when I first ate a creation called "lasagna" at a friend's house. I was hooked, and from that time forward, I would beg my mom to buy me any type of Italian frozen pasta dinner, as I had no notion that I could make such dishes myself from scratch, and I knew Mom was not so inclined. After I would eat the so-called "frozen entrees," she would crinkle up her nose and smile ruefully at my garlic-enhanced aroma. Thanks, Mom, for still letting me indulge despite the stink! There is no guaranteeing that your kids are going to have the same tastes as you, which sure is tricky for the mom, as I am learning...

Fortunately, in the case of pasta, my kids are equally exuberant. And, lucky for them, I have learned that I can cook it up it oh-so-yummy without the help of any blue box of mac and cheese! This pasta dish I concocted last week is rich and cheesy, based on a pizza I used to make with bottled alfredo sauce and roasted sweet potatoes and onions on top. Perhaps I was pushing my luck with the kale "parmesan" sprinkles, but everyone ate with gusto.

For roasted sweet potatoes and onions:
2 medium-large sweet potatoes, cut into 1/4 in. dice (about 1.5 lb.)
1 small sweet onion, diced
2 Tbsp. olive oil
1 tsp. salt
1 tsp. dried thyme
1 tsp. dried rosemary
1 tsp. dried sage
1/2 tsp. ground black pepper

For sauce:
2 c. plain don-dairy milk (I used oat milk)
1 tbsp. nutritional yeast
1 tsp. salt
1 c. grated Daiya vegan mozzarella
1/4 c. white flour
2 Tbsp. olive oil
1/2 roasted sweet potato-onion mixture
1 c. cooked broccoli florets

For pasta:
1/2 lb pasta (I used whole wheat medium shells)
Additional 1-2 cups of broccoli florets

For kale "parmesan" sprinkles:
1 bunch kale
1 Tbsp. olive oil
1/4 tsp salt
1/8 tsp. pepper
2 Tbsp. nutritional yeast
2 Tbsp. shelled pumpkin seeds

1. Preheat oven to 400 and oil a 9x13 or equally large baking pan. Combine diced sweet potatoes, onions, olive oil, salt, thyme, rosemary, sage, and pepper in the dish until the veggies are equally coated. Cover with foil and cook in the preheated oven for 45-60 minutes, until the veggies are very tender when pierced with a fork.
2. While the sweet potatoes are roasting. Line a baking sheet with parchment paper. Tear the leaves from the stalks of the kale, wash them thoroughly, and pat them dry. In a large bowl, toss the kale leaves with the tablespoon of olive oil, salt, and pepper. Lay out in a single layer on the baking sheet and place in the oven with the sweet potatoes. Bake for 10 minutes, and then check on the leaves; you want them crispy. If they are still looking a bit soggy, put them back in the oven for a few minutes until they are just turning slightly brown. Be careful, as you don't want to burn them. Once the leaves are crisp, let them cool a few minutes, and then whiz them in a food processor with the nutritional yeast and pumpkin seeds until finely ground. Stick the mixture back in the oven for 5-8 minutes to crisp everything up again.


3. Once you've taken care of the kale, boil a large pot of water and cook and drain the pasta according to the package directions. Steam your broccoli florets until tender in the microwave or in a steam basket on the stove-top.
4. When the sweet potatoes are done, add all of the sauce ingredients to the blender and puree until smooth. Oil a 9x13in baking dish, and add the cooked pasta, remaining sweet-potatoes, onions, and broccoli. Pour the sauce over all and stir to evenly coat. Then sprinkle with the kale parmesan.
5. Bake in the 400 oven for 15-20 minutes until heated through.

Tuesday, August 9, 2011

Pumpkin Bars with Pumpkin Butter Frosting and Oat Milk on the Side


My mom makes fabulous pumpkin pie: streusel-topped and cheesecake versions. I remember hovering around the kitchen while she would whip them up the day before Thanksgiving dinner. She would bake the extra filling in custard cups, and let me eat it for lunch, explaining matter-of-factly, "It's got pumpkin, milk, eggs--that's a totally wholesome lunch!"

Well, my child-self is certainly not complaining that she got to eat pie for lunch, but my adult-self is falling just short of feeding my kids the same. Instead, they get these pumpkin bars I made up today when I found myself with the soaked oats that were leftover from making oat milk and a new jar of pumpkin seed butter. After circumspectly eying the new "bites" and turning his face away in disdain, Sawyer finally agreed to allow the fork into his mouth, and then proceeded to devour them all. (This is how we refer to all types of food that Sawyer may be reluctant to eat if he knew their real name--as "bites." If you come to dinner at our house, you will hear us cajoling him to "Do his _____bites!," insert "tasty bites" for vegan chicken nuggets, "brownie bites" for black bean creations of all sorts, etc. Call it subterfuge if you must; whatever it is, I embrace it because it works.)

Getting back to the oat milk, I started making my own using the method Ann Fleming describes in Go Dairy Free, and I would recommend it to anyone looking for an easy, affordable way to make delicious non-dairy milk at home. You just soak 2 cups of rolled oats overnight with 5 cups of water (shake them vigorously together after combining). The next morning I strain the mixture through a fine mesh sieve, being sure to really squeeze the oats to get the good stuff out. I then blend the strained milk with 1 tbsp. chickpea miso and 1 tbsp. maple syrup, and pour it on our cereal and use it in my baking throughout the week. This process leaves you with leftover soaked oats, which I either just eat as they are, or incorporate them into baked goods like these pumpkin bars.

For pumpkin bars:
1 1/2 c. cooked white beans
1/2 c. canned pumpkin
1/4 c. canola oil
1/4 c. maple syrup + 2 Tbsp. agave (You could just use one or the other, of course)
1/2 tsp. each lemon, orange, and vanilla extracts
2 egg replacers ( I used Ener-G brand, but 1/4 c. of any starch mixed with 1/4 c. water should do just as well.)
2 c. oats, soaked overnight in water and then strained, as described in oat milk directions above
1/2 c. barley flour (You could sub white whole wheat or whole wheat pastry flour)
1/4 tsp. salt
1 tsp. pumpkin pie spice
a few tablespoons yogurt, optional

For Frosting:
1/3 c. pumpkin seed butter*
2 Tbsp. maple syrup or pumpkin butter
1/4 tsp. ground cinnamon

*I know this stuff is expensive and not readily available everywhere, but it sure is yummy. You can make your own if you have a good food processor by just whizzing  3/4 cup pumpkin seeds with a tablespoon of oil and a dash of salt until they turn into butter--Viola!

1. Preheat the oven to 350 and grease a 9 in square baking pan. Puree the beans, pumpkin, oil, sweeteners, extracts, egg replacer, and oats in a food processor until the mixture is as smooth as you can get it. The oats will still leave it with some texture.
2. Sift together the flour, salt, and pumpkin pie spice in a medium mixing bowl, and then add the wet ingredients from the food processor. Stir until just combined and pour into the prepared pan. Bake for 35-40 mins., until a fork inserted in the center comes out clean.
3. After taking the bars out of the oven, I am a fan of preserving their moisture by pricking them all over with the tines of a fork and then spreading a few tablespoons of yogurt on top, but this is optional if you don't have any yogurt around.
4. When the bars are cool, mix together the frosting ingredients and spread evenly over the top. Store the bars in the fridge until you are ready to eat them.


Monday, August 8, 2011

Sumpin' Fishy Savory Cookies


I debated posting this recipe since I just posted another recipe with seaweed in it, and that may not be everyone's favorite. In fact, even I am not always a huge fan of sea veggies, but I find these little savory cookies to be quite tasty and just had to share. Both Sawyer and Abiline have been munching them--they are a good combo for toddler snacks, since they are made of healthy ingredients, but are pretty calorie dense, unlike the pretzels my kids usually prefer.

1 1/4 c. white whole wheat flour (could sub regular ww or ww pastry flour)
1/4 c. rolled oats
1/4-1/3 c. dried seaweed, ground in a food processor (amount depends on how strong you want the flavor)
1 Tbsp. organic evaporated cane juice, or dry sweetener of choice
1 1/2 tsp. baking powder
1/3 c. canola oil
1-3 Tbsp. non-dairy milk, as needed

1. Preheat the oven to 350 and grease or line a baking sheet with parchment paper.
2. Whisk together the flour, oats, ground seaweed, sugar, and baking powder. Add the oil and mix with a fork until evenly moistened. If the dough is still too crumbly, add the non-dairy milk (I used hemp) 1 tbsp at a time until the dough holds together.
3. Form into walnut-sized balls, space evenly on your baking sheet, and flatten out, if desired. Bake for 8-10 mins. in the preheated oven until just golden on the bottoms.

Kabocha Broccoli Rice Casserole with Chicken-Style Seitan


I was trying to make some seitan with a tropical/Latin twist, but it didn't quite turn out as flavorful as I had hoped. Rather, it turned out to be a wonderful, basic chicken-style substitute that is not too chewy, so Sawyer loves it. Sometimes he has issues with seitan being a bit too tough for him to chew, but this one was a hit. I incorporated it into a rice casserole with kabocha squash and broccoli and sprinkled some crushed plantain chips on top. I did not expect this, but the plantain chips ended up having a sort of egg-y flavor, in that they looked like and had some of the chewiness of the scrambled eggs that Chinese restaurants put in their fried rice dishes.

When I make a casserole like this where the veggies are diced large, I just scoop out some of the dish and pulse it in the food processor so that the bites are easier to handle for the kids. This time I also fried the kids' portion into little rice-veggie pancakes so that they could more easily pick up the pieces with their fingers.

Easy Chicken-Style Seitan

1/2 c. coconut milk
1/2 c. pineapple chunks with juice
1/2 c. white beans
1 cup vital wheat gluten
1/4 c. chickpea flour
1 tsp. salt
2 tsp. chile powder (Up this amount if you want to really taste it as more than an accent)

1. Preheat the oven to 350. In a food processor, blend the coconut milk, pineapple, and beans until smooth.
2. In a small mixing bowl, combine the vital wheat gluten, chickpea flour, salt, and chile powder. Add the wet ingredients to the dry and mix together until combined, and you see the glutinous strands forming.
3. Divide the dough in two and form each one into a log shape. Tear off two pieces of aluminum foil big enough to wrap up each log and twist the ends like a Tootsie Roll. Place the foil-encased seitan seam-side down on a baking sheet and bake for 45 minutes in the preheated oven, until firm.

Kabocha and Broccoli Seitan Rice Casserole

For Rice:
1 1/2 c. brown rice (I used brown Basmati)
3 c. water
2 Tbsp. olive oil
2 tsp. dried oregano
2 tsp dried basil
1 tsp. dried thyme
1/2 tsp. salt
pepper, to taste

For Veggies:
1 Tbsp. olive oil
1 small sweet onion, in small dice
1 bell pepper, in small diced (I used purple, but whatever color you have on hand will do.)

1/2 medium kabocha squash cut in 1/2 in. chunks (You could sub butternut, but kabocha is so much better.)
1 Tbsp. soy-free Earth Balance
2 Tbsp. maple syrup
2 Tbsp. Balsamic vinegar
salt and pepper, to taste

2 c. broccoli florets, steamed until just tender and chopped into bite-sized pieces
1/2 seitan recipe above, diced into bite-sized pieces
1/3 c. barbecue sauce
1 c. plantain chips, crushed

1. Boil the water, add the rice, turn the heat to low, and cook until the rice is done, which usually takes about 40 mins. for me.
2. While the rice is cooking, pre-heat the oven to 400. Line a large baking sheet with parchment paper. In a large mixing bowl, combine squash chunks, maple syrup, balsamic vinegar, Earth Balance, salt, and pepper. Pour all onto the prepared baking sheet and bake for 30-40 mins, until squash is tender when poked with a fork.
3. Heat the remaining 1 Tbsp. olive oil in a small saucepan and saute the onion and bell pepper until softened and starting to brown, 7-10 mins.
4. When the rice is done, let it cool a bit, and then add it to the large mixing bowl, along with the olive oil and herbs. and stir to combine. Then add the cooked squash, sauteed onions and peppers, broccoli, seitan, and barbecue sauce. Stir to combine all evenly and then pour into an oiled 9x13 baking dish.
5. Sprinkle the plantain chips on top and bake for 20 mins in the 400 degree oven.


Monday, August 1, 2011

Vegetable of the Sea Noodle Casserole


The other day I was checking out at the grocery store, and there were shiny, brightly colored packages of "seaweed snack" begging to be grabbed as an impulse buy. Sawyer complied with the ploy and begged me to get some for him. Like any respectable mother, I gave in and bought my son the much-coveted seaweed treat, interested to see the look on his face when he discovered that it wasn't candy, per se. Who knows--maybe he would like it? He does insist that dark green is his favorite color. He was indeed brave and gingerly sampled a few morsels, but the real surprise was that Abiline devoured most of it. And ever since, she has been munching up daily doses of seaweed snack. So I decided that I would try to combine the kids' favorite meal-time foods--seaweed, peas (Abiline's other passion), and pasta (Sawyer's one true love). The "tuna-less casserole" idea has been done before, but I have never loved any of the recipes I have tried, so here is my own version, which Anthony called "delicious" and which the kids happily ate without complaint.

1 lb. pasta (We used spirals because those are easy for Abiline to eat.)
1/2 medium yellow or sweet onion, diced
1 tbsp. oil, for sauteeing the onion
1/2 head cauliflower, cut into small florets
1. c. frozen peas
1 1/2 c. cooked white beans
1 1/2 c. plain dairy-free milk (I used hemp)
1/4 c. seaweed flakes (These are pretty readily available nowadays--Trader Joe's, Costco, your local Asian market)
1/4 c. tahini
3 tbsp. soy-free Earth Balance, or your margarine of choice
1 tsp. salt
1 tsp. paprika
1 tsp. Old Bay Seasoning (If you don't want to buy this, you could just add some pepper and call it good)
1 c. cracker crumbs of choice
1/2 c. Daiya vegan cheddar cheese (optional)

1. Preheat the oven to 375 and grease a 9x13in glass pan. Boil a large pot of water and cook and drain the pasta according to the package directions.
2. Heat the oil in a small saucepan over medium heat, add the oinion, and saute until transparent and starting to brown.
3. Steam the cauliflower either in the microwave or in a steamer basket until tender. Thaw the peas.
4. Add 2/3 of the cauliflower, beans, dairy-free milk, seaweed, tahini, Earth Balance, salt, paprika, and Old Bay Seasoning to a blender and puree until smooth.
5. Add the pasta, peas, and the remaining cauliflower to the prepared pan, pour the sauce over it, and stir to combine. Sprinkle evenly with the cracker crumbs and Daiya, if desired. Bake for 20 mins. in the preheated oven.

Sweet Basil Hummus


As I've mentioned before, we are growing basil on our back porch, so whenever the leaves look abundant, I pick some and and incorporate them into dinner. This weekend I whipped up some basil hummus and mixed it with quinoa and roasted veggies for a quick dinner. The hummus, I think, tasted even better by itself with pita, though, without other flavors to crowd it out.

1/4 c. fresh basil
1 1/2 c. cooked chickpeas
1/2 tsp. salt
Dash of pepper
2 tbsp. tahini
1 tbsp. olive oil
1 tbsp. agave nectar
2-3 tbsp. lemon juice
3 tbsp. water

Add all of the ingredients to a food processor, starting with just the 2 tbsp. lemon juice, and puree until smooth. Taste and increase the amount of lemon juice if you want it more tangy.

Super Easy and Yummy Granola


Anthony and I love to have granola for breakfast, and Abiline likes it when she gets to eat it out of our bowls. Here is a recipe for a tasty concoction I made a few days ago. It only lasted two breakfasts, so it must have been good!

2 c. crispy rice cereal
3 1/2 c. rolled oats
1/2 c. wheat germ
1/2 c. maple syrup or other liquid sweetener
1/4 c. canola oil
1/3 c. sunflower seed butter
1 1/2 tsp. vanilla extract
pinch of salt

Preheat the oven to 350. Mix the cereal, oats, and wheat germ in a large bowl. Heat the maple syrup, oil, and sunflower seed butter in a small saucepan over medium heat until combined and gooey. Add the vanilla and the salt, and then pour the liquid over the dry ingredients and stir until everything is evenly moistened. Spread the granola on a large baking sheet and bake for 10 mins, then stir and bake for another 10 mins, or until looking a little brown on the edges of the pan. You can add any dried fruit you like, or even chocolate chips, but we actually didn't think it needed any extras.