Showing posts with label snacks. Show all posts

Tuesday, February 18, 2014

Green Smoothie Pudding

This recipe is basically baby food grown up. Anyone who has made their own baby food knows that mashing banana and avocado together is an easy and almost foolproof baby pleaser.  And whenever it hasn't been, I have been happy to eat the leftovers--which led me to conclude that this winning combo must just not be for babies. And, indeed, the banana and avocado mash-up has grown with my kids. Whenever I make yogurt nowadays, Abiline always wants either purple (whipped with frozen blueberries) or green, which is how this pudding version of a green smoothie has developed over time. This pudding is great in a parfait with banana and granola, or you can go all out with the baby food idea and eat it with baby "puff" cereal on top, like Abbie likes it. Go ahead--regress! We do it all the time around here...


This recipe makes two generous or four dainty servings.

3/4 cup white beans, rinsed and drained, if canned
1 small, ripe avocado
1 medium, ripe banana
1/2 cup plain non-dairy yogurt (I use homemade.)
1/4 tsp. stevia powder (I use Trader Joe's organic.)
2 Tbsp. coconut sugar or 2-3 pitted medjool dates, to taste
pinch of salt
1/4 tsp. spirulina powder
2 tsp. vanilla
1 cup spinach leaves
2 Tbsp. hemps seeds
2 Tbsp. lime juice
1-3 Tbsp. rice or coconut milk

Combine all the ingredients (starting with 1 Tbsp. non-dairy milk) in a high-powdered blender or food processor and blend until totally smooth, adding additional milk if necessary to get the mixture moving enough to blend up. I have used both a blender and food processor successfully, but if you are using a food processor, I have had better results with using the coconut sugar over the dates.  If you want a n utterly smooth consistency, you've got to use the blender.

Some after dinner smiles from this evening. Happy tummies, happy kids...


This recipe is linked to Allergy-Free Wednesdays Wellness Weekend Healthy Vegan Fridays

Tuesday, February 11, 2014

Sugar and Oil-Free Chewy Granola Bars


Every time I have tried to make homemade granola bars--which has been quite a few times, actually--they crumble. I just cannot get them out of the pan without the bars disintegrating into plain old granola cereal. I had pretty much given up, but then I got the idea from my cookie dough bliss balls that maybe beans and dates would make better binders then the oil and maple or brown rice syrup that are often used in vegan granola bars. Success! These came out of the pan easily in bar form and are portable if tightly wrapped and not placed where they will be smooshed. They have a crunch and toothsome texture from the steel cut oats and seeds, but they are chewy, not crispy. Perhaps, if you subbed in some brown rice cereal, you would get more of that light-airy Quaker crispiness, if that is what you want. I prefer the denser texture, though. My son ate these happily in his snack at school, and I even made some into a granola pie crust for my dairy and soy-free cheesecake by processing about half a pan with a bit of rice milk and then pressing the mixture into the pie pan.


1 cup steel cut oats
1/4 cup shredded coconut
1/2 cup sesame, hemp, or sunflower seeds, or a combination thereof
1/4 tsp. salt
3/4 tsp cinnamon
2 scoops stevia powder (I use Trader Joe's organic)
2 Tbsp. chia seed meal, coconut flour, or vegan protein powder
3/4 cup prunes, dates, or raisins, or a combination thereof
1/2 cup cooked chickpeas
1 tsp. vanilla
1/4-1/3 cup unsweetened rice milk
1 Tbsp. molasses

1. Preheat your oven to 350 and toast the oats and seeds for 5 minutes. Add the coconut and toast for 5 mins more.  Remove from the oven and transfer to a large mixing bowl. Mix in the salt, cinnamon, stevia, and chia seed meal or alternative.
 2. Place the dried fruit, chickpeas, vanilla, molasses, and 1/4 cup rice milk in a food processor or blender and process until smooth. If necessary, add more rice milk a Tbsp. at a time to get a smooth consistency.
3. Stir the wet ingredients into the dry until uniformly moistened. Line an 8 or 9 inch square baking pan with parchment paper. Pour the granola bar mixture into the pan, and then lay another piece of parchment paper on top and press the mixture down as firmly as you can. Refrigerate for about an hour before cutting. I store mine in the fridge until I am ready to pack or eat them.    

Dress up time. Seems that no matter how much they dress up, they all still look very much alike...


This recipe is linked to Allergy-Free Wednesday Wellness Weekend Healthy Vegan Fridays.

Tuesday, January 28, 2014

Build Your Own Breakfast Cookie

This past week I purchased carob chips for the first time in my life, as I was making a treat for a friend's dog and learned that chocolate is a no-no for pooches. I gave some of the chips to the kids on a whim, fully expecting that they would be promptly spat upon the table as my children dealt with the treachery of being given imitation chocolate. Imagine my surprise when they begged for more and continued to ask for carob chips every day since.  I was raised by a wonderful mother who was and is fiercely loyal to chocolate and all things sugar, who taught me at a young age that carob was an unpalatable chocolate imitation that only self-punishing "no-sugar moms" would eat. Who would have thought that I would so betray my roots and raise these carob-loving children and be feeding them sugar-free breakfast cookies. I hope my mother does not think of me as her own worst kitchen nightmare.

In my defense, I am not so pure as to be a "no-sugar mom," but I do always want my cookies to be healthier than everyone else in the family seems to prefer.  If I call my creations "breakfast cookies,"though, then everyone recognizes that they are not dessert cookies and is just happy that they are eating cookies for breakfast. I have seen a number of breakfast cookie recipes on various blogs, but they always seem to be more on the cookie side and less on the breakfast side to me. So, be warned: my idea of a breakfast cookie is like portable oatmeal, not a cookie that you eat for breakfast just because someone added flax seed and maple syrup to a Tollhouse cookie or some nonsense like that. Believe it or not, a breakfast-y treat like this can be tasty and kid-approved without any added sugar or oil.


Here is the basic formula, with some variations we have enjoyed. This makes 10-12 standard size cookies.

Basic Recipe
1 cup cooked quinoa
1/2 cup rolled oats
1/8 tsp salt
1/8 tsp. stevia powder
1/4 cup dried fruit (If the fruit is not particularly soft, soak it in boiling water for 10 mins. and then drain)
1 tsp. vanilla
2/3 cup applesauce, mashed banana, pumpkin, cooked sweet potato, or other fresh fruit or a combination thereof
1 Tbsp. tahini or sunflower seed butter
optional add-ins: 2-3 Tbsp. additional dried fruit, carob chips, mini-chocolate chips, hemp or sesame seeds

Preheat the oven to 350 and line a baking sheet with parchment paper. Add the quinoa, oats, stevia, salt, and cinnamon, if using,  to your food processor and pulse just until combined and oats are ground up some but not quite flour. Add your wet ingredients and buzz until combined. Your batter will be a bit thinner than regular cookies but thicker than muffin batter. Stir in any optional add-ins. Drop large spoonfuls onto your prepared baking sheet and bake for 10-12 minutes, until lightly browned on the bottoms. Let cool on wire racks for 5-10 mins. before enjoying.

Apple-Sweet Potato Variation
1 cup cooked quinoa
1/2 cup rolled oats
1/8 tsp salt
1/8 tsp. stevia powder
1/4 cup raisins, soaked in hot water for 10 mins. and drained
1 tsp. cinnamon
1 tsp. vanilla
1/3 cup applesauce
1/3 cup cooked sweet potato,
1 Tbsp. tahini
2 Tbsp. hemp seeds

Carob-Berry Variation 

1 cup cooked quinoa
1/2 cup rolled oats
1/8 tsp salt
1/8 tsp. stevia powder
1 tsp. vanilla
1/4 cup prunes
1/2 cup blackberries and/or blueberries
1/4 cup applesauce or pumpkin
1 Tbsp. sunflower seed butter
2 Tbsp. carob powder
3 Tbsp. carob chips

My little cookie-munchers, loving life!


This recipe is linked to Allergy-Free Wednesday Whole Food Fridays Wellness Weekend Healthy Vegan Fridays


Tuesday, January 7, 2014

Blackberry Muffin Sweet Potato Pudding Parfait

I love the Thanksgiving/Christmas season when Costco stocks those huge bags of organic sweet potatoes, which turn into so many wonderful sweet potato experiments. This particular sweet potato incarnation resulted when I decided that my nine-month old was tired of all of her baby food options, as she launched the "banana beet blueberry" mush pouch at me for the eighth time.  "What could I make..." I mused as I wiped pink goo off my baby-battered forehead,  "that would be new and delicious but still meet those high baby food standards (which should be all people-food standards, really) of not being sugar, fat, and salt-laden? She's never had a muffin, I suppose..."  So I pulled out all of the odds and ends in the fridge to make these surprisingly moist and just-sweet enough muffins. To entice my three-year-old to eat them, late last night I concocted this sweet potato "frosting," which I then decided would make for a delightful parfait!  I looked forward to this morning, when Emie devoured her muffin, Abiline took delicate frosting-laced nibbles of hers, and I indulged in breakfast pudding parfait.  All were satisfied.  For the time being.  Until I offer another muffin to Emie, and she launches it at my head.


 For the Blackberry Banana Muffins:

1 medium, ripe banana
1/2 cup fresh blackberries
1/2 pouch banana-beet-blueberry baby food (or sub another 1/2 cup blackberries)
1/2 cup rice milk
1/2 cup coconut cream (from the top of the canned coconut milk)
scant 1/4 tsp. stevia powder
2 tsp. vanilla
1/4 tsp. salt
1 tsp. baking powder
1 1/2 cups rolled oats
1/2 cup buckwheat flour

Preheat the oven to 350 and line muffin cups. I got 12 mini muffins and 6 regular-sized muffins out of this recipe.  In a food processor or blender, blend the banana, blackberries, baby food, rice milk, coconut cream, stevia, vanilla, salt, and baking powder until smooth. Add the oats and process again until totally ground up. Then add buckwheat flour and pulse just until combined. Spoon the batter into the prepared muffin tins until the cups are about 2/3-3/4 full and bake in the preheated oven, about 14 minutes for mini muffins and 20-22 minutes for standard-sized muffins, turning the pans half-way through the baking time. Let cool on wire racks before eating. I think they tasted best after sitting overnight in the fridge. Enjoy frosted with sweet potato pudding, or crumble into a parfait glass, alternating layers with the pudding and blackberries and/or bananas.

For the Sweet Potato Pudding/Frosting:

1 large sweet potato
1 medium banana
1/2 Tbsp. vanilla
1/4 cup shelled hemp seeds
2 Tbsp. coconut oil (I did not melt it.)
1-2 Tbsp. maple syrup

1. Bake the sweet potato at 400 degrees for about an hour, until very soft when poked with a fork. Remove the peel.
2. In a blender or food processor, combine the sweet potato flesh, banana, vanilla, hemp seeds, coconut oil, and 1 Tbsp. maple syrup. Blend until totally smooth. Taste, and if you want it a tad sweeter, add some additional maple syrup.

Here is the adorable culprit of meal-time mayhem, along with her cronies:


If you are wondering what on earth my kids are doing in this picture, I must tell you that I was pretty tickled that afternoon when they decided that the most enchanting activity was to build with staples. They made a city, train tracks, and "the longest bench in the world," while I was left wondering why I had spent so much money on toys for Christmas. Move over Legos...

This recipe is linked to Allergy-Free Wednesdays and Wellness Weekend.


Thursday, December 5, 2013

Ranch Hummus

A few months ago I was making a smoothie, which we always have with our dinner, and Abiline spied what I was putting in it (fruits, avocado, spinach, etc.) "No!" she wailed. "I don't want any FOOD in my smoothie!" You heard it here first, folks--the reason why your kids may not be eating what you give them: they don't want any food in their food.  Since that shocking incident, Abiline has treated many of my creations with suspicion. "What is this brown thing in my cookie dough ball?!" she demands. "A chocolate chip," I reply (although there may be a piece of a date or a black bean in there as well...)

She has yet to ask what is in her beloved "dip" that her carrots love to dive in.  I will tell you all the shocking truth: chickpeas, tahini, spices, oh my! The more sophisticated out there would call it "hummus." We call it "delicious" when we spruce it up with ranch-dip-style spices and add it to grilled "cheese." Mmmmm....you've got to try it. Just don't let the kids see you making it...


Ranch Hummus

1 1/2 cups cooked chickpeas (or one can, drained and rinsed)
3 Tbsp. lemon juice
2 Tbsp. tahini
1 1/2 Tbsp. extra-virgin olive oil
1/2 Tbsp. red-wine vinegar
2 Tbsp. water
3 tsp. dried parsley flakes
1/2 tsp. dried dill
3/4 tsp. onion powder
1/2 tsp. salt
dash of pepper
1/4 cup shelled hemp seeds

Add all of the ingredients to a food processor or high-powered blender and process until smooth.  Hooray--so easy!

Let's hear it for the girls! I try so hard to please them, but really all they want to munch all day are baby "Cheerios."


This recipe is linked to Slightly Indulgent Tuesday Allergy-Free Wednesdays Wellness Weekend.


Sunday, November 3, 2013

Baby-Led-Weaning with Allergies: Ideas for ages 6-8 months

My first baby loved baby food.  It never occurred to me to give him "real" food until he was around a year old and refused to swallow another mouthful of puree.

My second child barely tolerated any mush; she just wanted what was on my plate.  But I was reluctant to just let her dive in because I was afraid that if I did not follow the rule of introducing one new food at a time with a five day wait rule, I would somehow make her allergies worse, or not be able to tell which ingredient she was having an allergic reaction to.  Her whole weaning process was a battle, since she wanted to explore foods way faster than I was willing to let her.

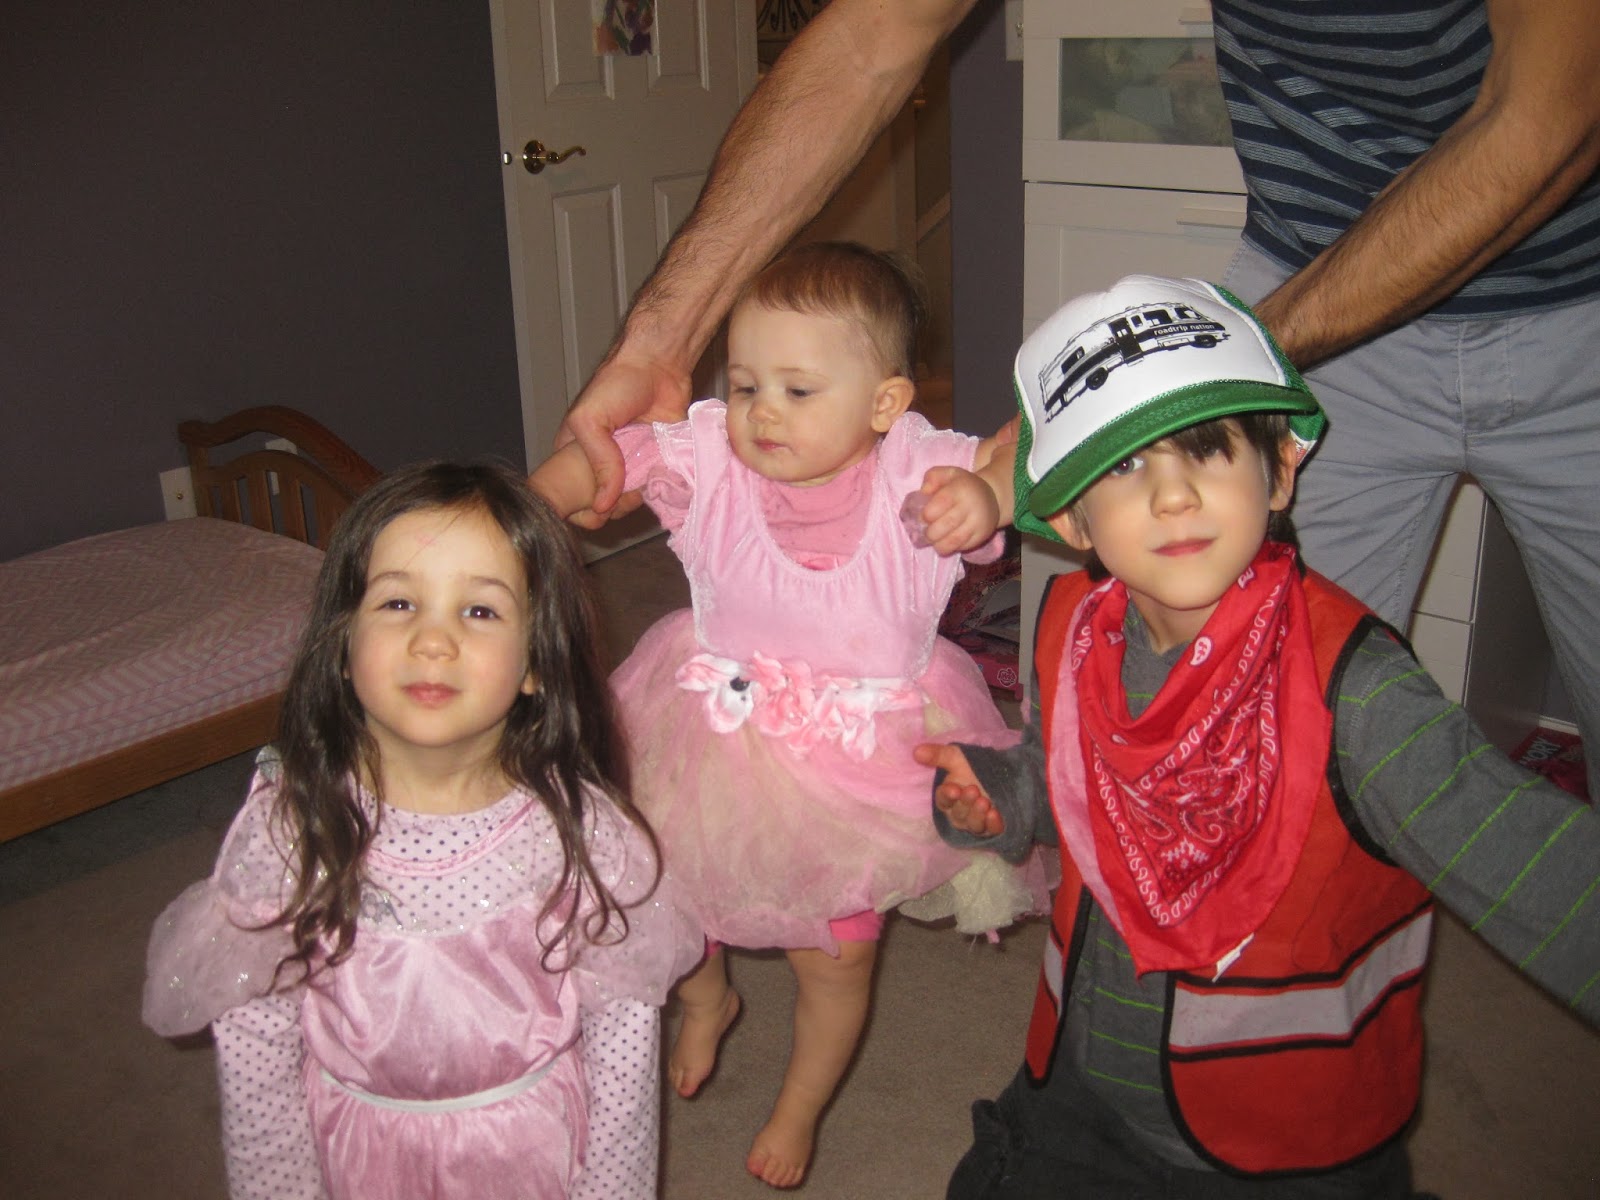
When my third baby reached that magical time around six months of age when she started grabbing for our food and clearly wanted to take part in meal time, I was filled with dread.  Already having two children with established food allergies, I have not had much hope of number three escaping that same fate.  I found myself agonizing, "Is there some way to go about introducing new foods that will help her to have less food allergies?" Some doctors have told me to introduce highly-allergenic foods early on in order to avoid allergies; others say to wait as long as possible. After letting Emie lick a spoonful of seemingly allergen-safe pancake batter and get a rash, I threw my hands up in the air and decided that she will probably have allergies no matter what I do.


I knew I didn't want to make freezer-fulls of baby food this time around or battle with my baby who wants to grab food off my plate. Could I do baby-led weaning with a child with such high food allergy potential?  I decided to go for it: avoid the top allergens--dairy, eggs, wheat, corn, nuts, peanuts, soy--but basically let her eat whatever we are eating rather than feed her mashed banana for a week, then avocado, etc.

We are about six weeks in to our allergy-friendly baby-led weaning adventure, and I wanted to share some things that I have found to be working so far, for other moms who may be facing this same challenge. Of course, I am not an authority on baby nutrition, so my approach is by no means a plan for all to follow, but I hope it will be helpful to those searching for ideas.

Fruits: Emelise has enjoyed sucking on the inside of banana peels, mango skins, and sucking the rest of the avocado off the skin. She has not had much luck holding the actual fruit--they're all too slippery. But at least she is getting a taste for them. She has had some success with holding large pear and apple slices and gnawing them. She loves kiwi and has managed to hold and devour them all on her own.

Yogurt: She has been loving her first tastes of homemade coconut-oat milk yogurt this week. I scoop it for her and then hand her the spoon for self-feeding.

Vegetables: She loves to suck on cooked broccoli trees and sweet potato. Green beans and carrots get sucked on for a few moments and then get thrown on the ground.

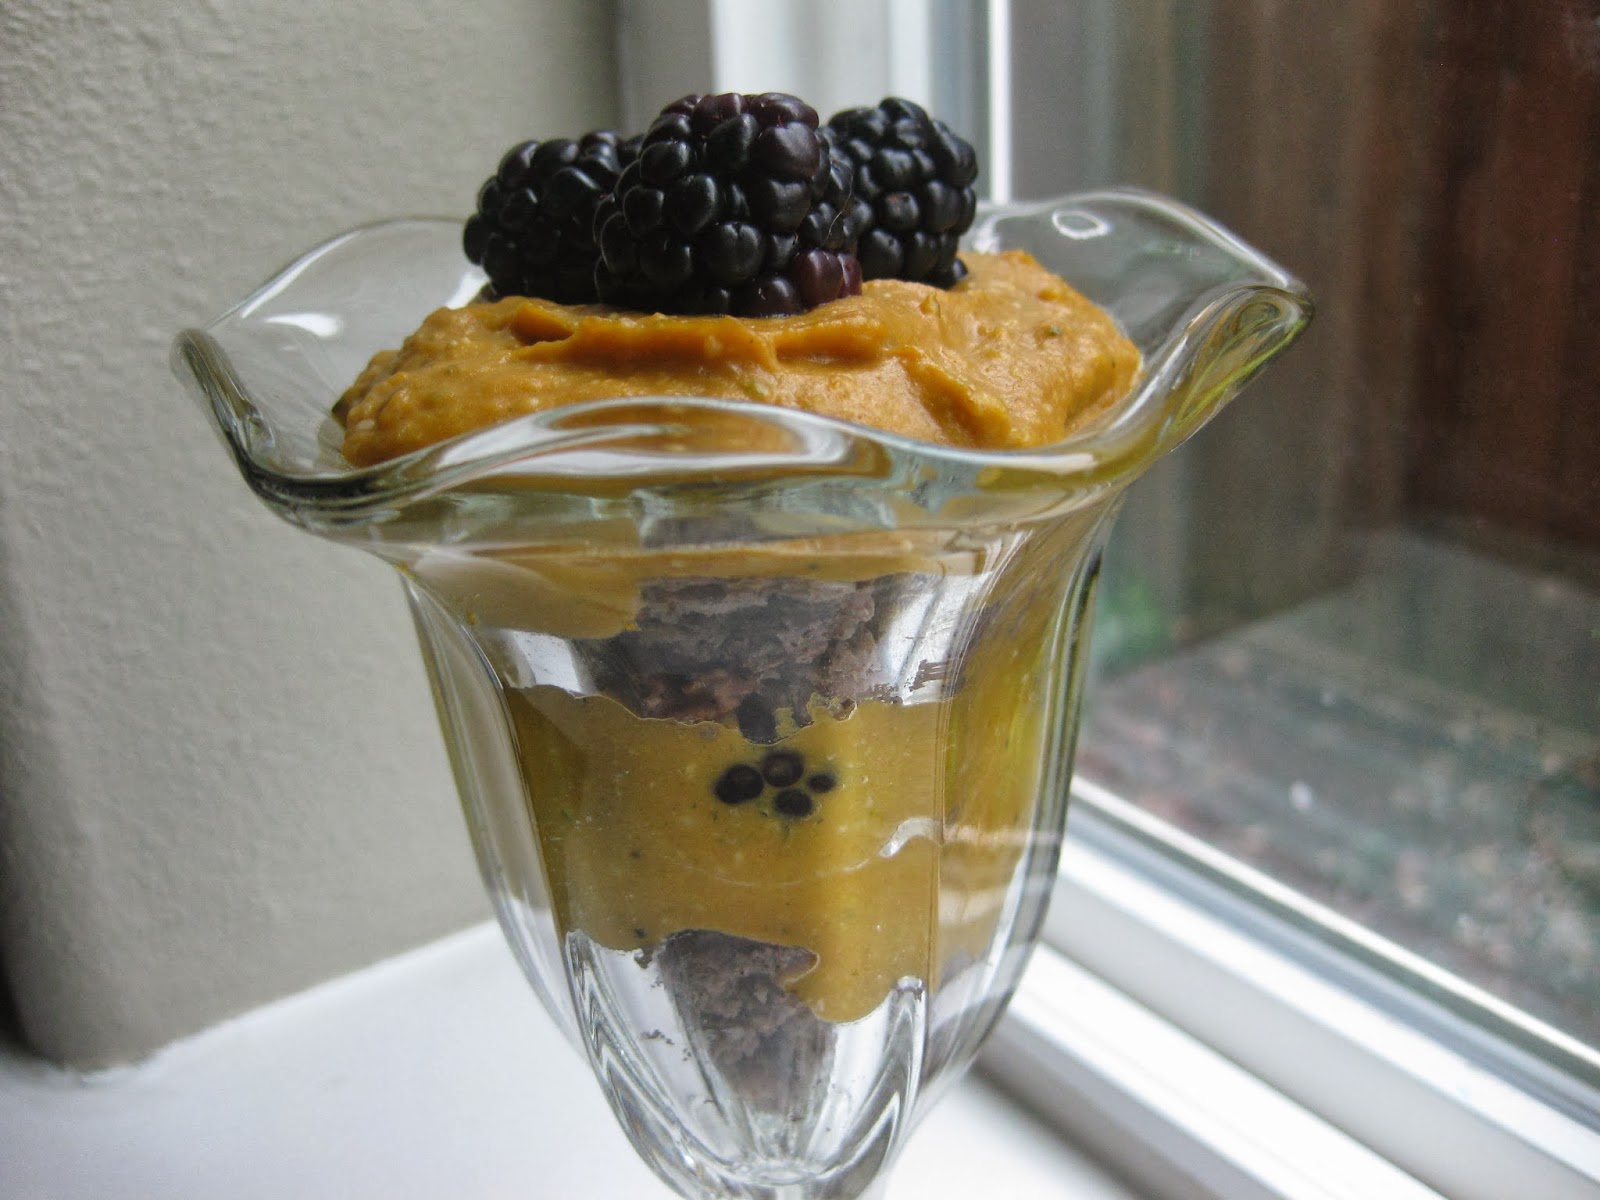
Smoothies: I have been making allergy-safe smoothies that Emie likes so much she will let me help her hold the cup:

Pumpkin-Pear Smoothie: Blend about 1/4 cup pumpkin puree, with 1/2 ripe pear, and enough rice, oat, or coconut milk to get it smoothed out.

Baby Green Smoothie: Blend a couple cubes of frozen mango, 1/2 small banana, a handful of fresh spinach, and a generous slice of avocado, along with enough coconut, rice, or oat milk to get it smooth.

Grains: Crunchy rice rolls are a big hit. Much easier to hold and gnaw on than those baby rice cakes sold for $3-$4 a bag. Trader Joe's just discontinued their vegan rice rolls, but I have found some on Amazon.

Baby Biscotti: I adapted this recipe for Banana Coconut Slices, subbing coconut oil and maple syrup, grinding the oats and coconut, and using a rice flour gluten-free blend I found at Costco.  I then sliced some of the bars into biscotti-sized chunks and baked them for 12 minutes on each side in a preheated 375 degree oven. They made great teething biscuits!


Buckwheat-oat pancakes:  Take your favorite vegan pancake recipe and sub the regular flour with 1/2 buckwheat flour and 1/2 oat flour. Crumble into small bits for baby to pick up.

Pumpkin Quinoa Breakfast Cookies: I saw a recipe for something like this and liked the idea, although the egg whites, flax seed, and white flour were a no-no, so here is my version:


2 1/2 c. cooked quinoa
1/3 c. homemade coconut milk yogurt (You could sub banana, applesauce, or more pumpkin.)
1/3 cup pumpkin puree
2 Tbsp. maple syrup
3 Tbsp. melted coconut oil
dash of salt
1 tsp. pumpkin pie spice, or plain old cinnamon

Mix all ingredients together and form into about 12 little cakes. Place on a cookie sheet lined with parchment paper and bake in a preheated 375 degree oven for 15-20 mins. Check them frequently, as you don't want them to get too crispy for baby.

These cookies are crumbly, which Emie liked because she could squish them and pick up tiny pieces to gum on.  If you want them firmer, then experiment around with adding some baby cereal or gluten-free flour. Admittedly, I ate most of these cookies, with Emie just doing small bites. At this stage, it seems that she only needs a few tablespoons of food over the course of the day to supplement her breastmilk feedings.

Oatmeal made from oat-milk pulp: When you make home-made oat milk (I describe the process simply in my yogurt post), the pulp is already processed finely for baby--just be sure to blend it long enough!  I thin it out a bit and add some applesauce, pumpkin, or smooshed banana. I find this to be the best way to make baby oatmeal: it's much cheaper than buying packaged baby food and is just as lump-free.

Protein: Just breastmilk at this stage! We are not doing nuts or soy, of course, and at this point I am still avoiding beans and seeds until between 10 and 12 months, as my other daughter had a reaction to lentils when I gave them to her early on.

I would love to hear your ideas and recipes you have found to work for your baby!

This post is linked to Allergy-Free Wednesday.

Tuesday, October 15, 2013

Clif Meets Lara Cookie Dough Bliss Balls: 11 Fabulous Flavors

I have been missing in action for some time now because in June we decided to look into buying a house. Suddenly, all my free time was gone as I poured over real estate listings.  After a pretty frantic, stressful time, we are finally almost all moved in to our new place and functioning again. So, friends, I am finally able to share my favorite creation ever with you: We call them "cookie dough balls" around here. I make a new kind almost every week, and the kids eat them up like they are, indeed, cookies.  Theses energy bites have the fruitiness of a Lara bar paired with the toothsome texture of a Clif bar and are insanely delicious. Every morning when Emie wakes me up, long before I am ready to emerge from the covers, I am comforted by the thought that after I trudge down to the kitchen, I can look forward to gobbling one of these as my morning treat.

There are a lot of energy ball/ bite recipes out there, but what I love about these is the beans. I think the combo of beans, seeds, coconut oil, and dates gives the perfect texture. Of the many flavors I have created, I think our favorite is chocolate mint. These can be made with either oats or buckwheat (if you want gluten-free); I like both equally and cannot tell much of a difference.

In other news, my friend who also has a child with severe food allergies has started a company called Allergy Warning Wear, which sells super-cure t-shirts for kids like ours to wear as a reminder to others of the severity of their food allergies. One of the designs is even named after my son!


Classic Cookie Dough:

3/4 cup hemp, sunflower, or pumpkin seeds, or a combination thereof
3/4 cup cooked chickpeas (drained and rinsed, if canned)
3/4 cup rolled oats or raw buckwheat groats (You can sub 1/4 cup of this with chia seed meal.)
1/4 cup rice protein powder
1/4 tsp. salt
1/4 cup coconut oil
1/2 cup pitted dates
1/4 cup sunflower seed butter or tahini
1-2 Tbsp. maple syrup
2 tsp. vanilla extract
1/4-1/3 cup dairy-free chocolate chips (I like min-chips, if you have them.)

In a food processor, pulse together the seeds, beans, oats or buckwheat, protein powder, and salt to form a fine meal. Add the coconut oil and pulse until evenly incorporated. Add the dates, seed butter, maple syrup (starting with 1 Tbsp.), and vanilla and buzz until evenly combined. If the dough is a bit dry and not yet perfect cookie dough texture, add a bit more maple syrup. Stir in the chocolate chips, form into golf-ball-sized balls, and store in the fridge.

Now the variations.....

Snickerdoodle:
Omit chocolate chips and roll balls in cinnamon sugar.

Cranberry Orange:
Replace the dates with dried cranberries, double the chickpeas, and take out the seed butter. Replace vanilla with orange extract. Omit chocolate chips.

Chocolate-Banana Brownie:
Replace chickpeas with black beans, 1/4 cup of the oats/buckwheat with cocoa powder, and dates with rehydrated dried banana.

Chocolate Mint:
Replace chickpeas with black beans and replace vanilla with mint extract. (Use tahini for the seed butter.)

Tropical:
Replace oats/buckwheat with banana chips, replace dates with dried papaya and/or mango, replace seed butter with coconut butter, and replace vanilla with coconut extract. Omit chocolate chips.

Chocolate-Covered Cherry:
Replace dates with dried cherries and vanilla with imitation almond extract or cherry extract.

Lemon Poppyseed:
Add 1/4 cup poppyseeds and the zest of one lemon to the mix. Add 3 tsp. lemon extract instead of vanilla. Increase chickpeas to 1 cup and reduce seed butter by 2 Tbsp, using tahini. Omit chocolate chips.

Sunflower Seed Butter and Jam:
Use sunflower seeds and sunflower seed butter. Replace dates and maple syrup with 1/4-1/3 cup of your favorite jam. Omit vanilla extract, maple syrup, and chocolate chips.

Oatmeal Raisin Cookie:
Increase chickpeas to 1 cup and reduce seed butter by 2 Tbsp. Add 2 tsp. cinnamon and replace dates with raisins. Omit chocolate chips.

Pumpkin Pie:
Add 3 tsp. pumpkin pie spice and replace seed butter with pumpkin puree.

Enjoy!!!! Eat these, and maybe you'll be as cool as my kids....


This post is linked to Slightly Indulgent Tuesday Allergy-Free Wednesday Wellness Weekend Allergy-Friendly Lunchbox Love and Healthy Vegan Fridays.

Sunday, June 9, 2013

Raw Banana Cream Pudding (No nuts!)

Generally, my husband is a great supporter of my cooking efforts.  Since I can count on the kids almost always complaining about something on their plate, I rely on Anthony to bolster my spirits with his gusto for the meal. When it comes to dessert, though, his palate leans toward the traditional fat and sugar laden kinds. If he suspects beans or dates, he's gone. Ironically, my healthier dessert creations are most popular with the kids.  Abiline loved this pudding treat I whipped up when I came home from church last week, famished because I had forgotten to pack any snacks for myself. She and I had a little girl date gobbling it up.  Little did she know she was eating a whole banana, my fruit-hating girl!


2 medium, ripe bananas (yellow, but not really spotty)
1/4 cup coconut butter
1/4 cup raw, shelled hemp seeds
2 tsp. vanilla extract

Place all of the ingredients in a high-powered blender or food processor (I used my Vitamix) and blend until completely smooth. This made two really fillings servings.  Try adding a tablespoon or two of cocoa powder for a chocolate version! Or double the recipe and fill a pie shell for banana cream pudding pie!

Let's hear it for pudding power!!!
 This recipe is linked to Slightly Indulgent Tuesdays Allergy Free Wednesdays Whole Foods Wednesdays Gluten-Free Wednesdays Raw Food Thursdays Wellness Weekend Healthy Vegan Fridays.

Tuesday, May 28, 2013

Crispy Sunflower Seed "Bacon" Bits

Usually the kids eat fine for breakfast and lunch, but dinner is a drawn our affair during which the kids stare into space, and we continuously have to remind them to acknowledge the food on their plate. I don't know what it is; maybe they are trying to stave off bedtime? So we are trying different tactics to improve the situation.  Last week we tried the no-nagging method: Let's see what happens if we just give them 45 minutes, offer an incentive if they finish, and then don't do any coaxing. The positive vibe at the dinner table was a plus, but, as a mom, I wasn't ok with just letting them not eat for nights in a row. So this week we are trying to motivate them with a trip to their favorite restaurant this weekend if they can eat without complaining or coercion all week. So far we are three nights down with good attitudes!

Admittedly, I have been helping them along by not giving them any super "challenging" meals. Tonight it was linguini with a creamy white sauce, sprinkled with these faux bacon bits I woke up thinking about last night. I have heard of coconut bacon, but wanted something that would mimic crispy bacon while still providing some protein.  So here we have the super-simple sunflower seed turned new and improved Bac-o recipe. I think these would be great on salad as well!


1/2 cup raw sunflower seeds
1/2 Tbsp. olive oil or coconut oil
1 Tbsp. liquid coconut aminos, or soy sauce if no soy allergy
1Tbsp. maple syrup
scant 1/4 tsp. smoked paprika

Heat oil in a small skillet over medium heat. Add the sunflower seeds and stir around until a bit toasty looking. Add the coconut aminos or soy sauce, maple syrup, and smoked paprika. Stir for another minute or two to get everything well-coated and crispy. Remove from heat, cool, and serve.

This recipe is endorsed by the whole Holden crew and linked to Slightly Indulgent Tuesday, Allergy-Free Wednesday, Gluten-Free Wednesday, Whole Foods Wednesday, Wellness Weekend,  Healthy Vegan Friday.


Wednesday, April 24, 2013

Sunflower Seed Ranch Roasted Chickpeas

Emelise Marie was born 5 1/2 weeks ago, and I am slowly figuring out how to do life with three kids. After months of ignoring all the cooking blog posts in my inbox, I like food again and am starting to find time to putter around in the kitchen, trying to satisfy that seemingly insatiable nursing mother's appetite in healthy ways.


In the first few weeks after Emie's birth, when I was in full recovery mode, Anthony did the grocery shopping. I sent him to the store for some dried beans, and he came home with about $50 worth.
(I should have been more specific as to how much exactly we needed.) As a result, I have been seeking ideas for new ways to use chickpeas. When I ran across a post for BBQ-ranch pizza on the Sweet Roots blog, the thought occurred to me that BBQ ranch roasted chickpeas may be good. So I gave it a try tonight, whipping up a sunflower-seed based sauce instead of the usual tofu-based. I couldn't stop munching them! We did try them on top of pizza, which was yummy, but I think I prefer to eat them straight so that the flavor is undiluted.


1 1/2 cups cooked chickpeas (drained and rinsed, if canned)
1/2 c. raw sunflower seeds
2 Tbsp. barbecue sauce
1 Tbsp. maple syrup
1 Tbsp. olive oil
1 tbsp. apple cider vinegar
3/4 tsp. sea salt
3/4 tsp. onion powder
3/4. tsp. dried parsley
1/2 tsp. dried dill
dash of pepper
3-4 Tbsp. plain non-dairy milk, to thin

1. Preheat the oven to 400. Line a large cookie sheet with parchment paper.
2. In your food processor or blender, blend all of the ingredients except the chickpeas, starting with 3 Tbsp. milk and adding more if necessary to get a smooth, dressing-like consistency.
3. In a medium bowl, add the chickpeas and blended sunflower seed ranch and stir to evenly coat all the beans.
4. Spread the chickpeas out in a single layer on your prepared baking sheet. Bake in the preheated oven for 20 minutes. Flip them around and then bake for 20 mins. more. They are done when golden and a bit caramelized.

This recipe is linked to Allergy-Free Wednesday  Slightly Indulgent Tuesday Allergy-Friendly Friday 
Wellness Weekend.  

Monday, March 4, 2013

Sugar-Free Pumpkin Caramel

Oh, you mean to tell me that it isn't fall anymore?  Well, while this post is a bit late, and pumpkin is not all over the stores in February, I didn't want to wait another year to share this recipe. My kids don't wait until Halloween to play dress-up, so why wait until autumn-time to enjoy the magic of pumpkin caramel? This makes a great filling for ridiculously simple oatmeal bars, or you can use it as a fruit dip, or just eat it out of the pan like Abiline did.  It is thick, creamy, and sweet, with no butter or sugar. And easy to make, too!


1/2 cup full-fat coconut milk
1/2 cup pumpkin puree
1/2 cup, packed, pitted dates
1/4 tsp. sea salt
1 tsp. vanilla extract

1. Combine all ingredients except vanilla in a small saucepan, bring to a simmer over medium heat, and simmer for about 10 minutes, until the dates are very soft.
2. Add the vanilla extract and transfer the mixture to your food processor or blender. Puree until totally smooth. Enjoy!


Now that I've got you in the mood, I'll take this opportunity to reminisce about our autumn adventures. It doesn't seem that long ago, considering that we just finally threw out our pumpkins last week.   Happy Halloween in February, everyone!


  This post is linked to Slightly Indulgent Tuesday, Allergy-Free Wednesday, Gluten-Free Wednesday, and Wellness Weekend.


Saturday, June 30, 2012

Flourless Chocolate Pumpkin Seed Cookies

So many flourless baking creations use almond flour, so I set out to try to use a seed as the base instead. These cookies are so simple and delicious and make a nutritious, but still indulgent, snack. I have baked these a few times recently on days when nap time is almost over and I need a snack pronto before I have hangry kids roaring out of bed.  Chocolate cookies just have such a nice way of getting eaten without complaint.


1 cup raw pumpkin seeds (I have also used sunflower seeds with yummy results.)
1/4 cup coconut milk (I've used both light and regular.)
1/4 cup coconut sugar
1/8 tsp. sea salt
1/4 cup allergy-friendly chocolate chips

1. Preheat the oven to 350 degrees F, line a cookie sheet with parchment paper, and spread the seeds out in an even layer on the prepared pan. Roast for 8 minutes, then stir them around and bake for 7-9 minutes more. Watch them closely so that they brown without burning.
2. While the seeds roast, in small saucepan heat the coconut milk, coconut sugar, salt, and chocolate chips until the chocolate is melted and the mixture is smooth.
3. Let the coconut-chocolate mixture and the seeds cool for a few minutes just to avoid danger of totally burning yourself. Then add all of the ingredients to your food processor and blend until you have a thick, uniform paste. There will be a few little bits of seeds--no problem.
4. Form the dough into about 10 cookie dough balls. Dampen the tines of a fork and make a cross-hatch pattern on each cookie. Bake in the preheated oven for 8 minutes. Cool for 5 minutes and then remove them from the pan and cool completely on a wire rack.


This recipe is linked to Allergy-Friendly Friday, Slightly Indulgent Tuesdays, Allergy-Free Wednesdays, Whole Foods WednesdayGluten-Free Wednesdays, Tastetastic Thursday, Happy Lil' Loves Are Baking, Fit and Fabulous Friday and Wellness Weekend.   


Monday, June 25, 2012

Brownie Batter Breakfast Pudding

I have not posted any new recipes for a while because we have been out of town visiting my parents in Washington.  (It is not as easy to experiment in someone else's kitchen, especially when their pantry looks quite a bit different from yours.)  My parents are unapologetically dairy, meat, and refined flour eaters, but they are accepting of our diet. My mom was great about going to Trader Joe's and stocking up on whatever staples she could find for us. As we were winding up our visit, I wanted to eat up all the food she had purchased especially for us, as I knew my parents wouldn't eat it themselves.  There was about half of a can of leftover black beans in the fridge that I needed to make use of on our last day, and thus this breakfast pudding was born. If you love brownie batter but never dare to eat more than a spoonful or two because you don't want to make yourself sick, then this healthified version is a dream come true.  I made this pudding again today for my breakfast and topped it with some Grape-Nuts I had coated in tahini and brown rice syrup; it is also great with some extra sunflower seed butter swirled in.  For my kids' lunch today, I mixed the pudding with some yogurt and extra banana.  There were no complaints.
 

2/3 cup cooked black beans (rinsed and drained, if from a can)
2 Tbsp. cocoa powder
1/2 Tbsp. sunflower seed butter
1/3 cup non-dairy milk
2 Tbsp. raisins
1/2 small, ripe banana
1 scoop stevia powder (1/32 tsp.)
1/2 tsp. vanilla or coconut extract
1/2 scoop vegan protein powder (optional)

Blend all of the ingredients in a food processor or blender until completely smooth. Top with granola and/or bananas, or swirl in some yogurt or sunflower seed butter. I love that it is filling, delicious, and has no refined sugars.

This post is linked to Breakfast Ideas Monday, Allergy-Friendly Friday, Slightly Indulgent Tuesdays, Allergy-Free Wednesdays, Whole Foods Wednesdays, Your Green Resource, Wellness Weekend and Fit and Fabulous Fridays.   

 We forgot our camera on our trip, but, right before we left, Anthony took a picture of our Joy School graduate. Meanwhile, Abiline is studying bubble-blowing.


Friday, May 25, 2012

Banana Cream-Filled Chocolate Frozen Yogurt Cups

Abiline is on fruit strike. Well, she kind of has been since she decided that she didn't like baby food anymore--which was pretty much a month or two after she started eating it.  I make her a smoothie every day to trick her into some fruit consumption (and to add some greens and avocado, too).  When we were at Trader Joe's last week, she picked up a box of chocolate-covered bananas and put them in the cart; I didn't buy them, but I was intrigued by a way to perhaps get her to eat bananas.  Why not try chocolate yogurt-covered frozen bananas?  It seemed easier to me to use mini-muffin cups than to try to dip the bananas in the yogurt.  These mini frozen yogurt cups also have the advantage of being small, which suits my kids who are always insisting, "I want a little bite!" As you can see from the picture, they get melty pretty quick, so I recommend keeping them in mini-muffin liners and peeling back the paper as you eat them so that everyone's fingers don't get too sticky.  Or Abiline and Sawyer actually ate theirs with a fork.  Trust me, we're not usually so refined.
 

For the chocolate yogurt:
3/4 cup plain non-dairy yogurt (I use homemade.)
1 heaping Tbsp. cocoa powder
2 Tbsp. sunflower seed butter
5 pitted dates, soaked for a few hours to soften them, or microwaved for a minute and then drained
1/8 tsp. pure stevia powder (may not be necessary if you use yogurt that has some sweetener in it)

For the banana cream filling:
1 ripe banana
2 Tbsp. coconut butter

1. Prepare a min-muffin pan with cupcake liners.  If you want bigger portions, you could of course use 6 regular muffin cups instead.
2. Prepare the chocolate yogurt by buzzing all of the ingredients in a food processor or blender until totally smooth.
3. Transfer the yogurt to a bowl, clean out the blender or food processor and then puree the banana and coconut butter until smooth.
4. Spoon a generous teaspoon of chocolate yogurt into the bottom of each mini-muffin cup. Top with a generous teaspoon of banana cream filling, and then top the filling with another heaping teaspoon of yogurt. If you are using regular-sized muffin cups, then use 1-2 tablespoons of each.
5. Freeze the cups for a few hours to firm them up. I found that bigger muffin cups take much longer to get totally frozen: about 2-3 hours for the mini cups, but 5-6 for the big ones.


We are having some pretty warm days here now, so it was time this week to bust out the water games. As you can see, the kids had a blast.  Just a $2 pack of paintbrushes from Ikea and a large pot of cold water, and we had some good, clean fun. Or, it was clean until they started to add dirt and make "soup" in the pot.


This recipe is linked to Fit and Fabulous Fridays, Slightly Indulgent Tuesdays, Allergy-Free WednesdaysWhole Foods Wednesdays, Tastetastic Thursday  , Happy lil ❤'s are baking Wellness Weekend and Fresh Bites Fridays